 Check for traffic
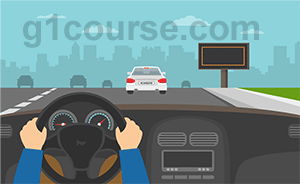
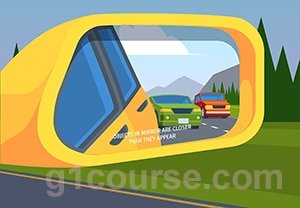
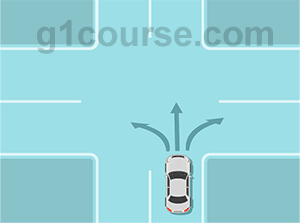
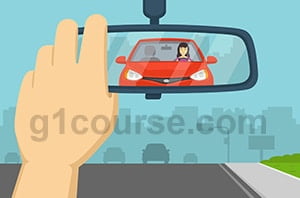
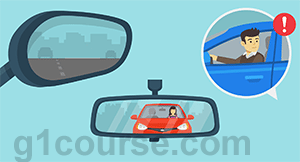
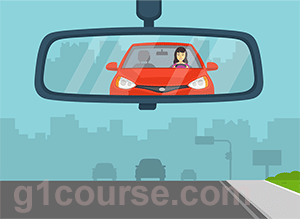
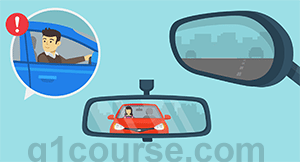
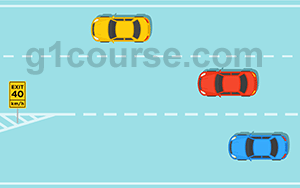
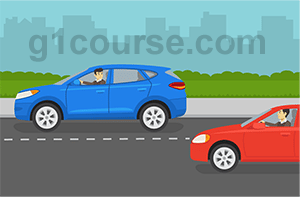
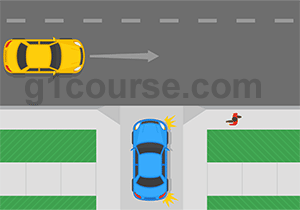
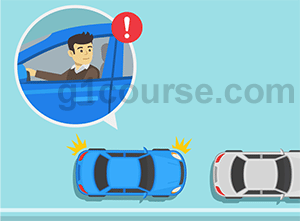
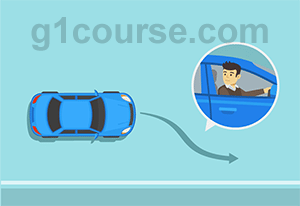
As you approach the turning point, the examiner will be watching you keenly to see if you’ll look all around for traffic before you begin to slow down. Check your rearview and wing mirrors to see the vehicles approaching from behind. If you’re changing lanes, turn your head 90 degrees to either side to check your blind spot.
 Move into the proper side of the lane
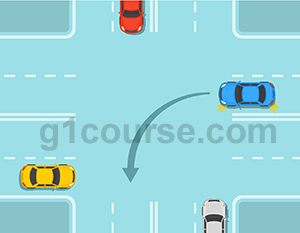
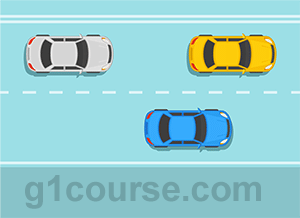
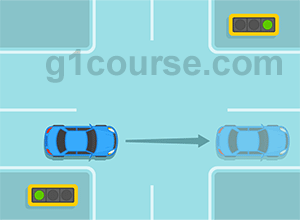
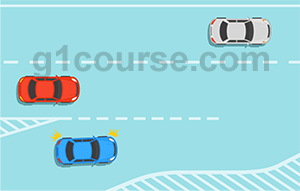
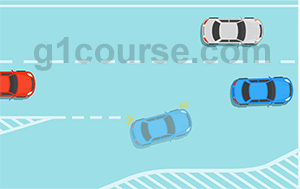
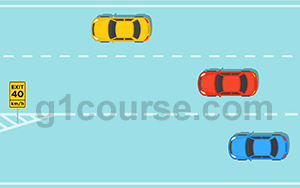
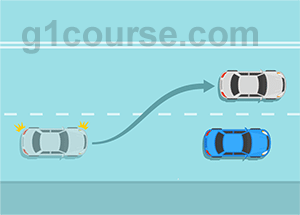
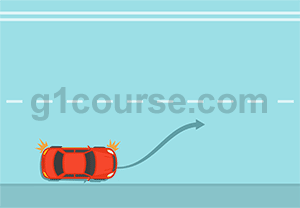
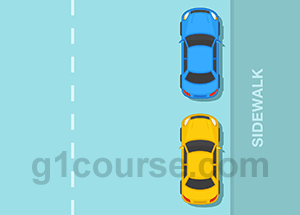
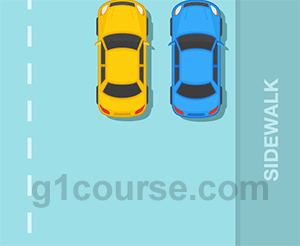
When the road is clear, navigate your car to the far left or right lane.
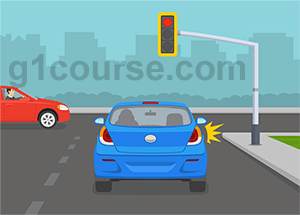
Give a signal to other road users
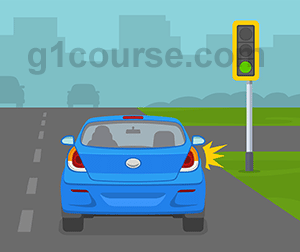
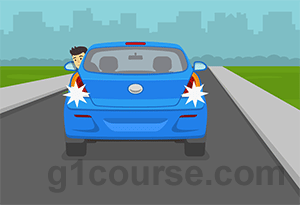
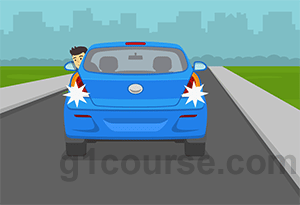
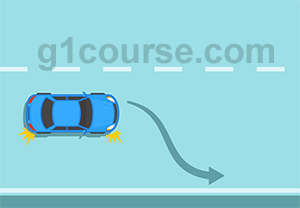
Turn on your direction indicator before you slow down to change direction. There’s an exception, though. If you notice there’s traffic on side roads or driveways before you reach the intersection, the examiner expects you to signal a turn after passing those entrances. That way, the other drivers trying to enter the road won’t assume you’re about to make a turn before the intersection.
 Adjust your speed
Make sure to decelerate to a steady and appropriate speed, ideally not less than 15 km/hr. Downshift into a lower gear as you slow down a vehicle with a manual transmission system. However, remember not to keep your foot resting on the clutch pedal.
 Keep a safe following distance
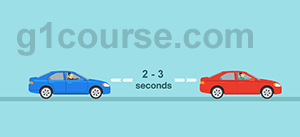
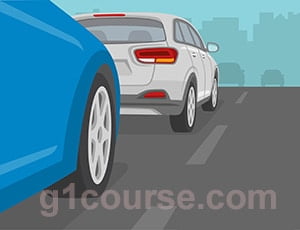
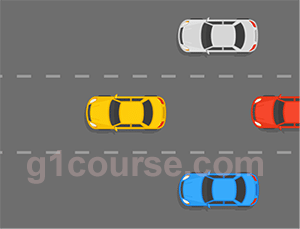
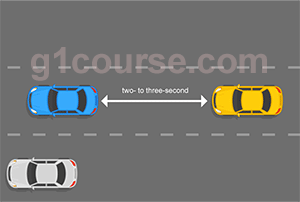
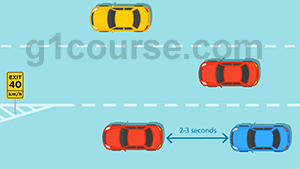
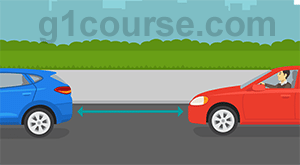
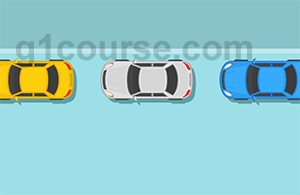
Avoid tailgating as you get near the intersection. The rule is to allow a distance of 2-3 seconds between you and the vehicle in front.
 Stop completely
You should not move slowly, whether forward or backward. Sometimes, you might pass the stop line before the vehicle finally stops. If that happens, avoid reversing to line up correctly. Begin the turn only when the traffic conditions at the intersection allow it.
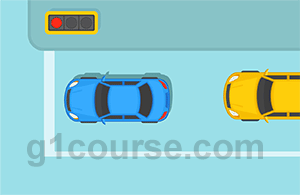 Leave enough space for easy maneuvering
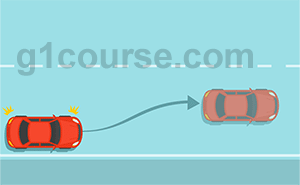
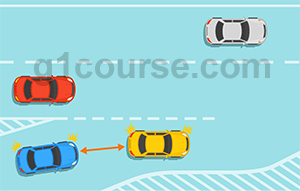
The distance between you and the vehicle ahead should allow you to pull out and move without shifting to reverse gear. keeping enough space can prevent potential collisions. If you’re too close and the vehicle behind accidentally hits you, you could slam into the car in front. Or, if the vehicle ahead backs up or rolls backward, it can easily collide with yours.
 Stop before the stop line
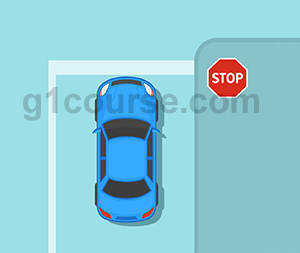
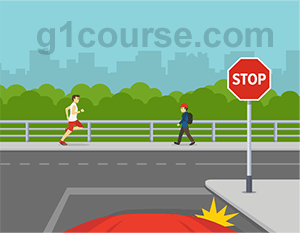
Bring your vehicle to a stop behind the stop line. That’s if your vehicle is leading others towards the intersection with a stop sign or red light. But stop lines are not present at each intersecting road. However, you’ll probably see a marked or unmarked crosswalk. Stop your vehicle here. What if you cannot find a crosswalk? In that case, stop at the edge of the sidewalk or intersection.
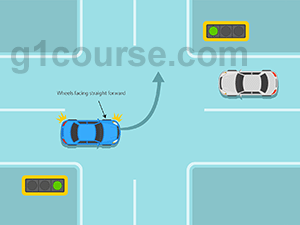 Keep wheels properly aligned
While at the stopping point, ensure the front wheels are straight, not left – if the examiner wants you to make a left turn. That reduces the risk of getting pushed into oncoming traffic. You should also keep the wheels straight if you’re instructed to turn right. As such, if the vehicle behind accidentally pushes you, you won’t easily plow into pedestrians.

 Check for traffic
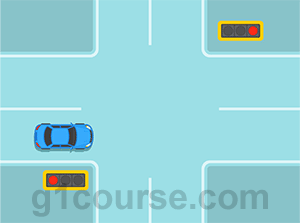
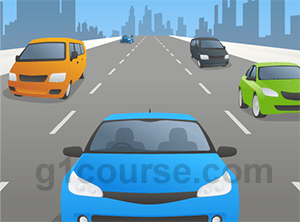
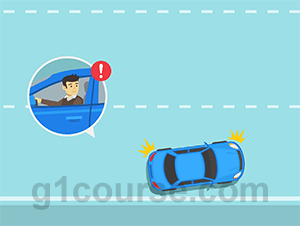
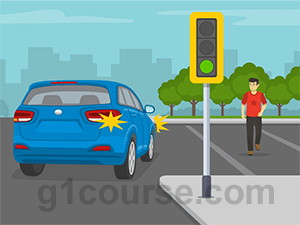
When traffic conditions allow for a turn (green light or way is clear), scan the traffic right, left, and head. Remember, some motorists might want to overtake you while you’re making the turn. Therefore, don’t forget to do a mirror and shoulder check immediately before entering the intersection.
When you’re unsure who should yield the right of way, you’ll want to make eye contact with other drivers, motorcyclists, bicyclists, and pedestrians. If another road user goes before you and they are trying to avoid colliding with you, that’s a sign you’ve not scanned your traffic situation well.
 Keep both hands on the steering wheel (Unless one hand is disabled)
Intersections are inherently dangerous. When you have your hands on the steering wheel, you’ll be more ready to swerve if an emergency arises while turning.
 Don’t shift gears in manual transmission vehicles
Maneuvering intersections to make turns demands greater control from you when driving a manual car, van, or truck. That’s why you need to avoid changing gears while you turn unless the intersection has at least four lanes and you don’t want to slow traffic. It’s acceptable to shift gears as soon as the vehicle starts moving, but not in the middle of a turn.
 Adjust speed
Once you’re ready to start the turn, move your van forward within 4-5 seconds. Maintain a steady speed while turning and begin to accelerate as you complete the left or right turn. You should drive at a speed that gives you maximum control over the truck so that you don’t pose a safety risk or interfere with traffic flow.
 Turn wide/short
The rule is to drive into the lane that corresponds with the lane you’re turning from and – of course – end destination in mind. Keep an eye on the curbs and lane markings to ensure you don’t cross over them.
 End a turn in a lane
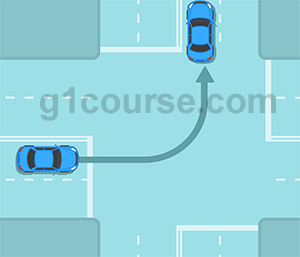
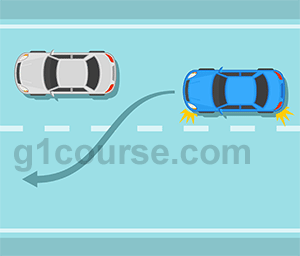
A turn ends in the lane corresponding to the lane you turned from. When an assessor commands you make a left turn onto a road with multiple lanes, here’s what you’ll do. Adjust to normal driving speed and navigate into the curb lane if traffic conditions allow.
What if you’re completing a right-hand turn but you cannot access the right lane. Perhaps it is the parked vehicles blocking it. Whatever the barrier, the best decision would be to drive into the next accessible lane.
 Check for traffic
Don’t forget to look in your rearview and side mirrors to steer clear of any traffic hazards as you adjust your traffic speed to normal.
 Merge into traffic safely
Increase your speed to match the flow of traffic on that road. Ideally, your vehicle should gain speed moderately in light traffic. When driving in heavy traffic conditions, accelerating faster may be necessary. Another thing worth highlighting is that manual transmission vehicles require changing gears as you accelerate.

 Check for traffic
Scan the way before slowing down. Look right, left, and ahead for traffic. Also, keep an eye on the traffic behind you using your car mirrors.
 Adjust your speed
As you move closer to the intersection, be sure to decelerate to a steady speed. Vehicles with a manual transmission system have the option to downshift into a lower gear as you slow down. Refrain from keeping your foot resting on the clutch pedal.
 Keep a safe following distance
Allow a distance of 2-3 seconds between you and the vehicle ahead.
 Stop completely
You could drop some points if you allow your car to roll forward or backward. If the car completely stops past the stop line, do not reverse to position it correctly. When it’s time to get moving, drive across the intersection. Or move forward slowly to ensure the way is clear.
 Leave enough space for easy maneuvering
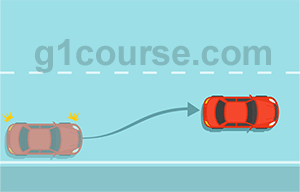
Make sure there’s enough distance between you and the vehicle ahead. In case the vehicle in front stalls at the intersection, you can easily pull out and get moving without backing up. That’s not the only reason to leave space. You might avoid crashing into the vehicle ahead if the driver behind accidentally hits you. Also, if the truck in front rolls back or reverses, the risk of collision reduces.
 Stop before the stop line
Stop your vehicle behind the stop line if you’re leading others towards the intersection with a stop sign or red light. Be informed that you might not see stop lines at every intersection. In that case, check for a marked or unmarked crosswalk and stop there. If you cannot find the crosswalk, stop at the edge of the sidewalk or intersection.
 Check for traffic
Keep scanning the traffic scene as you wait to get the green light or for traffic to clear. Quickly glance over the traffic on the right, left, and in front before entering the intersection. If you don’t know who should yield the right of way, try making eye contact with other motorists and pedestrians. If another road user goes before you and they’re trying to avoid colliding with you, that’s a sign you’ve not scanned your traffic environment as required.
 Keep both hands on the steering wheel (Unless you have a hand disability)
Driving through intersections is inherently risky. When you keep both hands on the steering wheel, you’ll be more ready to swerve if an emergency situation arises while maneuvering the intersection.
 Don’t shift gears in manual transmission vehicles
Navigating intersections demands greater control from you when driving a manual transmission car, van, or truck. That’s why you need to avoid changing gears while crossing an intersection unless the intersection has at least four lanes and you don’t want to slow down traffic. It’s acceptable to shift gears as soon as the vehicle starts moving, but not after you enter the intersection.
 Check for traffic
While adjusting to normal traffic speed, look in your rearview and side mirrors to monitor the traffic situation and steer clear of any traffic hazards.
 Adjust speed
Once you’re ready to begin the maneuver, move your van or truck forward within 4-5 seconds. Increase your speed to merge into the traffic around you. Ideally, your vehicle should gain speed moderately in light traffic. When driving in heavy traffic conditions, accelerating faster may be necessary. Keep in mind that manual transmission vehicles require changing gears as you accelerate.
 Check for traffic
Scan your surroundings and see if there’s traffic on the left or right as you get closer to the intersecting road. When it is necessary to slow down for the intersection, look in the mirrors for vehicles following you.
 Keep the same speed
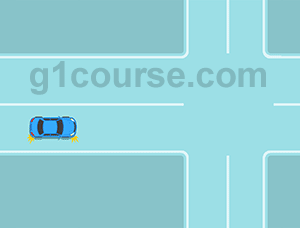
While going through the intersection, maintain your speed. There’s an exception to this – if you have doubts that traffic may appear ahead when moving through the intersection. In this case, consider slowing down or covering the brake and look out for potential collision threats, including:
- Pedestrians trying to cross the intersection roads
- Other drivers approaching the intersection at higher speeds
- Vehicles moving too close to the edge of the road
 Keep a safe following distance
Try maintaining a distance of at least 2-3 seconds between you and the vehicle ahead.
 Stay in your lane
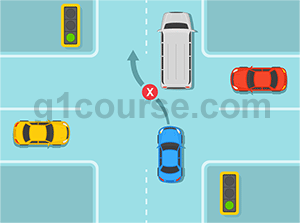
No changing lanes or crossing lane markings when driving through an intersection. It doesn’t matter if another vehicle is blocking your way, such as a vehicle making a left turn. The best course of action is to slow down or stop while waiting for the way to clear.
 Keep both hands on the steering wheel (Unless you have a hand disability)
Having your hands on the wheel gives you the maximum steering control you need in a high risk point like an intersection. You’ll be more ready to swerve if an emergency situation arises.
 Don’t shift gears in manual transmission vehicles
Navigating intersections demands greater control from you when driving a manual transmission vehicle. As such, it’s advisable to avoid changing gears while crossing an intersection unless the intersection has at least four lanes and you don’t want to slow down traffic. It’s acceptable to shift gears as soon as the vehicle starts moving, but not after you enter the intersection.
 Check for traffic
If the traffic conditions force you to slow down when driving through the intersection, scan your rearview and side mirrors before adjusting to normal speed.
 Check for traffic
When you get on the entrance ramp, look in the mirrors and take a quick glance over the shoulder for your blind spot. Identify a gap where you can merge. Of course, don’t forget to keep an eye on the vehicles ahead of you on the ramp. The task requires greater focus until you reach the selected gap to merge and adjust your speed to blend with the traffic around you.
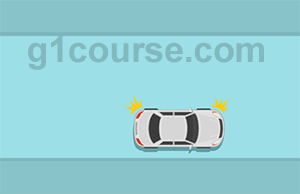
 Turn on your signal light
It’s imperative for motorists on the freeway to see you once you get on the entrance ramp.
 Keep a cushion space around your vehicle
The standard rule of keeping a safe following distance of at least 2-3 seconds between you and the car ahead also applies when you’re on the ramps. Maintaining the cushion space when vehicles are moving fast can prove challenging. You’ll have to constantly change your traffic speed to keep an ideal spacing around your van.
Merging safely into traffic requires proper timing and space. Make sure you don’t move in beside another truck. It is also important to stay within the lane markings even when you have crossed over into the acceleration lane.
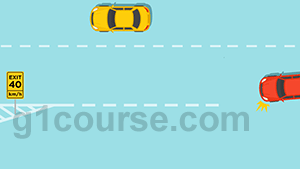
 Slow down when turning the curve of the ramp
Passing through the curve can be dangerous if you’re moving at a high speed. Therefore, try to be slow enough to make a safe maneuver. Your vehicle needs to gain more speed in the acceleration lane to match the freeway traffic speed.
 Merge
Merge
As you merge into freeway traffic, adjust your speed to blend into the surrounding smoothly and gradually. Move to the center of the nearest freeway lane.
 Turn off your signal light
Once on the freeway, don’t forget to cancel the signal light.
 Check for traffic
Always be aware of the traffic around you on the freeway. You must check your rearview and side mirrors every few seconds, preferably 5-10 seconds.
 Monitor your speed
Don’t go over the freeway traffic speed limit. You’re also discouraged from driving too slowly unless in a case of safe operation or compliance with the law. Scan ahead 12-15 seconds. That can allow you to spot potential obstacles and road hazards (like a broken-down car) early enough to change your speed or lane.
 Keep enough space
Be sure to allow a safe following distance of at least 2-3 seconds between you and the vehicle ahead. But what about tailgaters, you ask? Don’t let the driver behind follow you too closely. You need space on both sides of your vehicle. Consider changing lanes if they don’t seem to adjust to an ideal spacing. Shifting lanes is also crucial instead of driving behind large vehicles that block your view of the traffic scene.

 Check for traffic
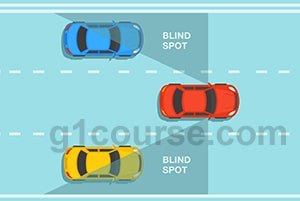
Check your left- and right-hand traffic and vehicles behind you before you shift into the deceleration lane. What’s more, look over your shoulder for your blind spot, especially if there’s an occupied lane on your right-hand side.
 Turn on your signal light
Signal to move into the deceleration lane.
 Enter the deceleration lane
Observe smooth and gradual transition as you enter the exit lane. Do not go over any lane markings. Some expressways have a multi exit or deceleration lanes. If you see solid lines in such a scenario, you’re not allowed to shift lanes.
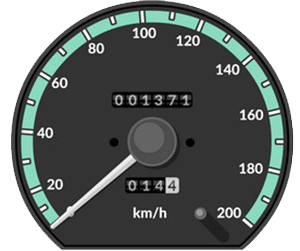
 Monitor your speed
When entering the deceleration lane, you must maintain your speed until you’ve finally moved into the lane. Then, reduce your speed gradually to match the speed required for the exit ramp. If you’re driving a manual transmission car, downshift to a lower gear as you decelerate. As you pass through the exit curve, slow down enough to make a safe maneuver.
 Keep enough space
Be sure to allow a safe following distance of at least 2-3 seconds between you and the vehicle ahead.
 Turn off your signal light
Cancel your signal as soon as you get on the exit ramp.
 Check for traffic
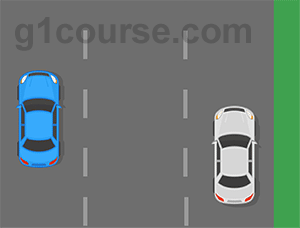
Make sure you’re aware of the traffic scene by looking left, right, in front, and in the mirrors as you wait to shift lanes. Glance over the shoulder for your blind spot as well.
As an added safety precaution, you should scan the traffic in the lane next to the one you intend to enter. This might reduce the risk of a collision with the motorists entering the next lane if you both moved simultaneously.
 Turn on your signal
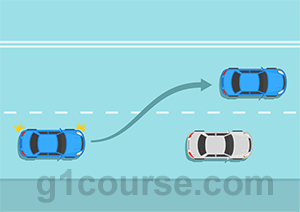
If you see space to shift lanes, signal and shoulder check your blind spot before you start leaving your lane into another. Sometimes, you might want to change lanes, but the lane in mind has heavy traffic. It’s fine to signal even if you haven’t found enough space to move. Motorists behind you will know that you’re scanning for space, allowing them to adjust or react safely.
 Keep a safe following distance
Always allow a distance of at least 2-3 seconds between you and the vehicle in front.
 Adjust your speed
Increase or reduce your car speed to correspond with traffic in the lane you want to enter.
 Change lanes
Moving from one lane into the center of another should be smooth and gradual.
 Keep both hands on the steering wheel
It’s imperative to have both hands on the wheel unless one hand is disabled. You’ll have maximum steering control if an emergency arises while shifting lanes.
 Turn off your signal light
Cancel your signal light once you’ve merged into the traffic in the new lane.
 Check for traffic
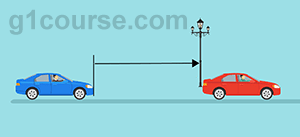
Don’t start decelerating until you’ve checked for signs that legally allow you to pull over. After that, analyze the traffic situation in front and behind you. Coming to a safe roadside stop requires keeping a gap of at least 150 meters in both directions. And before you stop, be sure to do a shoulder check if traffic on the right might overtake you.
 Turn on your signal light
Give a signal before you slow down. If you notice there’s traffic navigating into the road from side roads or driveways located before your stopping area, don’t signal until you’ve crossed those road entrances. That way, the other motorists trying to enter the road won’t assume you’re about to make a turn before reaching the stopping area.
 Adjust your speed
As you move closer to the stopping point, be sure to decelerate to a steady speed. Downshift into a lower gear as you slow down if you’re controlling a car with a manual transmission system. But avoid leaving your foot resting on the clutch pedal.
 Put your vehicle in a parallel parking position
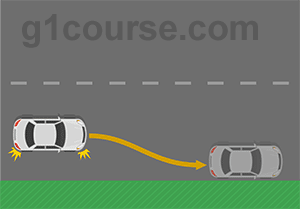
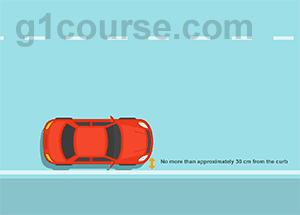
Come to a stop parallel to the curb. The gap from the curb to your vehicle must be 30cm or less. The stopping spot must not block any entry points to the road. In a situation where a curb is not available, the examiner expects you to stop far off the side of the busy road.
 Turn off your signal light
Once you’ve parked the vehicle in a safe position, cancel your signal and turn on the hazard lights.
 Put your car in park
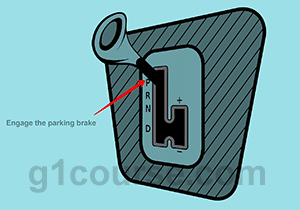
Let’s start with manual transmission vehicles. If you’re asked to park but leave the engine running, put your car in neutral and engage the parking brake. But if you need to turn off the engine, you should gear shift into low or reserve. As for automatic transmission vehicles, put the gear shift in park and engage the parking brake.
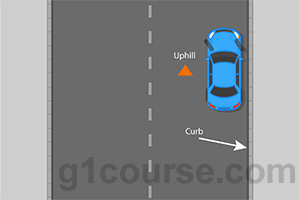
Always remember to turn the car wheels against the curb if the parking point is on a hill. If a curb is not available, turn the front wheels to face where the curb should be.

 Start the engine
After powering your vehicle, disengage your parking brake. Then, choose the appropriate gear to get moving.
 Turn off hazard lights
Once the hazard lights are off, turn on the direction indicator light.
 Check for traffic
Look in the rearview and side mirrors. Also, glance over your shoulder to check for your left blind spot.
 Accelerate
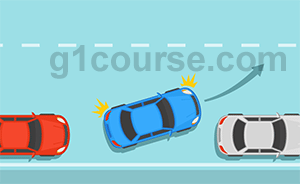
As you move back into the road, increase your speed steadily and gradually. You need to return to normal traffic speed, matching the surrounding traffic. Your vehicle should gain speed moderately in light traffic. When driving in heavy traffic conditions, accelerating faster may be necessary. And remember, manual transmission vehicles require changing gears as you accelerate.
 Turn off your left turn signal light
Once you’ve merged into traffic, cancel the signal.
 Adjust your speed
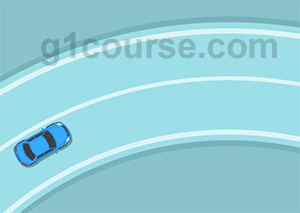
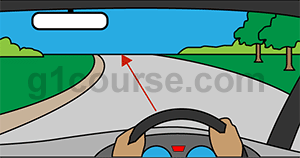
As you move closer to the curve, check for road signs indicating the curve shape and the safe speed to observe. Or try picking clues from the vehicles going around the curve on that type of road unless it’s a blind curve.
You should keep your speed slow enough once you’re about 30 meters into the curve. If you’re going around a blind curve, reduce your speed before you enter the curve. And once you’re in, drive slowly and maintain speed while covering the brake. You never know if another vehicle might accidentally get into your space, especially in tight curves.
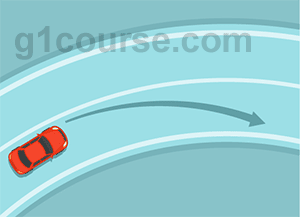
Start increasing your speed to normal traffic speed when you’re a few meters from completing your go-around. Don’t change gears in a manual transmission vehicle when passing the curve. Otherwise, this might compromise your control. Also, the wheels might lock when you shift into a lower gear.
 Stay in the center of the lane
When moving into the curve, be sure to scan across it. If it’s not a blind curve, scan around it as well. This trick can help you avoid wandering into another lane than when you just focus on the way directly ahead of you.
 Check for traffic
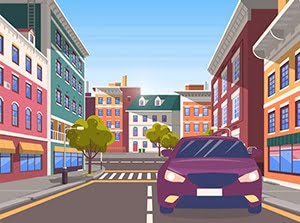
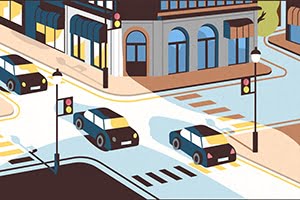
When driving along a business area in a town or city, you’ll likely come across many entry points to the road. You can expect pedestrians or motorists to constantly enter and leave the business establishments, institutions, construction sites, etc. Pay great attention to the traffic situation in these sections to avoid colliding with people or vehicles entering the road.
 Look in the rearview and side mirrors
Always check your mirrors every few seconds, preferably 5-10 seconds. If a business area has heavy traffic or motorists don’t move at matching speeds, increase your mirror checking frequency.
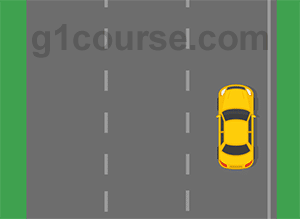
 Drive in the curb or center lane
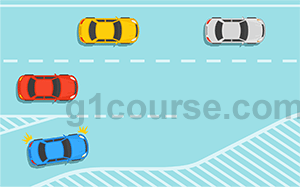
If a curb lane is accessible, use it for through traffic. If blocked or presents many potential hazards, opt for the center lane. These are safest options for through traffic. Remember to stay centered in your lane. Also, look 12-15 seconds ahead to spot any road hazards so that you can react safely right in time.
 Monitor your speed
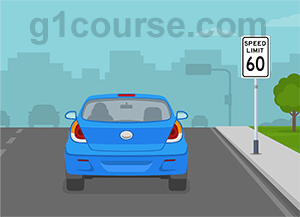
Don’t go over the traffic speed limit. You’re also discouraged from driving at an unreasonably slow speed. Scan ahead 12-15 seconds. This will allow you to spot potential obstacles like a broken-down car early enough to change your speed or lane.
 Keep enough space
Allow a safe following distance of at least 2-3 seconds between you and the vehicle in front. If you have to stop behind another car, ensure the space can allow you to pull out and get moving without reversing. You know the space is enough if you can see its rear wheels.
If another motorist is tailgating you, increase your speed. You need space on both sides of your vehicle when driving on a multi-lane road. Avoid blind spots of other motorists.
Driving behind large vehicles is never a good idea, especially in slow traffic. That’s because they restrict your view of the traffic scene.
 Check for traffic
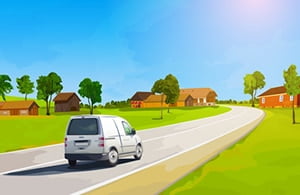
When driving in a residential area, constantly scan the traffic situation around entrances to schools, crosswalks, sidewalks, driveways, and more. If passing a rural road, pay attention to entry points to residences, industrial areas, and farms. Look left and right to confirm the way is clear of traffic hazards before moving.
 Look in the rearview and side mirrors
Always check your mirrors every few seconds, preferably 5-10 seconds. If the area has heavy traffic or motorists moving at varying speeds, you’ll want to increase the mirror scanning frequency.
 Stay centered in your lane
If a residential section doesn’t have lane markings, stay centered in the traveled part of the residential or rural road, but not near the parked vehicles. Look 12-15 seconds ahead for potential road hazards. If a curve or a hill is compromising your view of the traffic scene in front, consider moving right. This reduces your risk of getting into a collision with oncoming traffic over the center line.
 Monitor your speed
Drive within the traffic speed limit. It’s also imperative to avoid moving at an unreasonably slow speed. What’s more, keep a steady speed and scan ahead 12-15 seconds. This will allow you to spot potential obstacles like a broken-down car early enough to change your speed or lane.
 Keep enough space
Leave a safe following distance of at least 2-3 seconds between you and the vehicle in front. If you have to stop behind another car, ensure the space can allow you to pull out without backing up. There’s enough space if you can see the rear wheels of the vehicle ahead.
If another motorist is tailgating you, increase your speed. Driving behind large vehicles is never a good idea, especially in slow traffic. They block your view of the traffic scene.
 Check for traffic
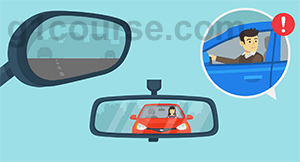
Before reducing your speed, scan your mirror to see the vehicles approaching from behind. Glance over the shoulder for your blind spot before moving into position to back up.
 Turn on your signal light
Give a signal before you slow down. If you notice there’s traffic navigating into the road from side roads or driveways located before your stopping area, don’t signal until you’ve crossed those road entrances. That way, the other motorists trying to enter the road won’t assume you’re about to make a turn before reaching the parking area.
 Decelerate steadily
Vehicles with a manual transmission system give the option to downshift as you slow down. Avoid leaving your foot resting on the clutch pedal.
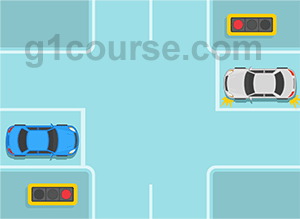
 Stop
Stop
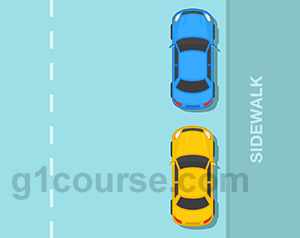
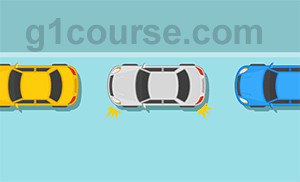
Your car must stop next to or parallel to the parked vehicles you see in front of the unoccupied parking space. It doesn’t matter if the vehicles in the park are real or imaginary. Come to a complete stop when you’re in front of the vacant parking space. Remember to allow at least a 60cm gap between you and the parked cars.
 Check for traffic
Before you begin reversing, scan the situation around your car and do a quick shoulder check to ensure the way is clear or traffic conditions allow it.
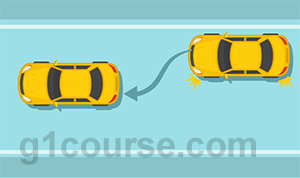
 Reverse into space
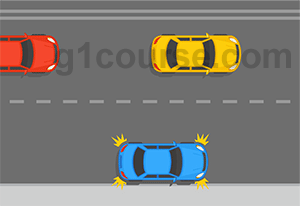
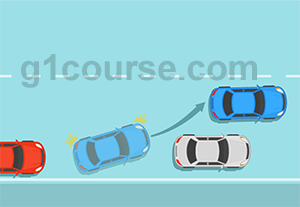
Turn the steering wheel in the curb direction and reverse until you’re nearly halfway into the parking space. Steer the car until you’re parallel to the curb without hitting it or other vehicles. After aligning the vehicle with the curb in the parking space, slowly move forward or backward as necessary to keep enough space for other vehicles to pull out. Also, you must ensure your car fits within pavement markings. If a curb is not available, park your vehicle far off the traveled part of the road.
 Put the vehicle in park
Let’s start with manual transmission vehicles. If you’re asked to park but leave the engine running, put your car in neutral and engage the parking brake. But if you need to turn off the engine, you should gear shift into low or reserve. As for automatic transmission vehicles, put the gear shift in park and engage the parking brake.
Remember to turn the car wheels against the curb to prevent your car from rolling if the parking space is on a hill.
 Start the engine
After powering your vehicle, disengage your parking brake. Then, choose the appropriate gear to start moving.
 Turn on your signal light
Signal that you’re about to move out of the parking space.
 Check for traffic
Scan your mirrors and glance over your shoulders before you pull out.
 Accelerate
As you move back into the road, increase your speed steadily and gradually. You need to return to normal traffic speed, matching the surrounding traffic. Your vehicle should gain speed moderately in light traffic. When driving in heavy traffic conditions, accelerating faster may be necessary. Manual transmission vehicles require changing gears as you accelerate.
 Turn off your signal light
Once you’ve pulled out of the parking spot, cancel the signal.
 Check for traffic
Look at traffic in front and scan the rearview and side mirrors before you start reducing speed for the turn. Glance over your shoulder if needed to check for your right blind spot.
 Turn on your signal light
Give a signal before you slow down. If you notice there’s traffic navigating into the road from side roads or driveways located before your turning point, don’t signal until you’ve crossed those road entrances. Otherwise, the other motorists trying to enter the road might assume you’re about to turn before reaching the turning area.
 Decelerate steadily
If you’re driving a manual transmission vehicle, downshift as you slow down. But don’t leave your foot resting on the clutch pedal.
 Stop your vehicle in a parallel parking position
Come to a stop parallel to the curb. The gap from the curb to your vehicle must be 30cm or less. The stopping point must not block any entrance to the road. In a situation where a curb is not available, the examiner expects you to stop far off the side of the busy road.
 Check for traffic
Before you begin the turn, check for traffic behind you and glance over the shoulder for your blind spot. Don’t turn unless the way is clear or traffic conditions allow. And always scan for traffic in both directions whenever you stop while turning.
 Turn on your left signal light
Signal that you’re about to start turning.
 Decelerate steadily
If you’re driving a manual transmission vehicle, downshift as you slow down. But don’t leave your foot resting on the clutch pedal.
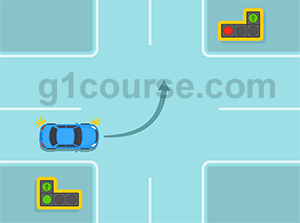
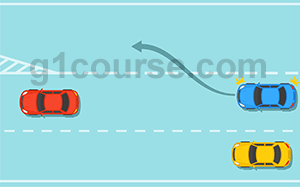
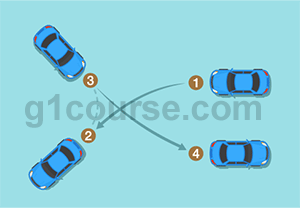 Turn around
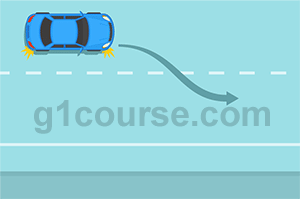
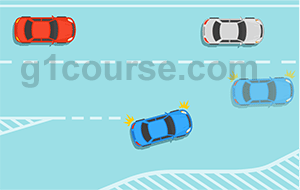
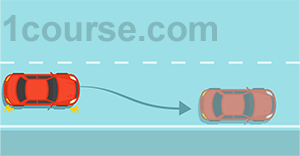
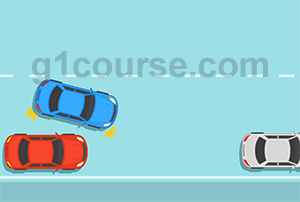
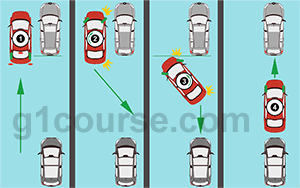
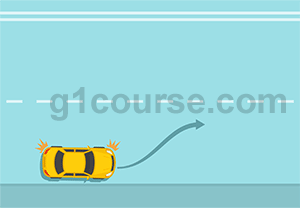
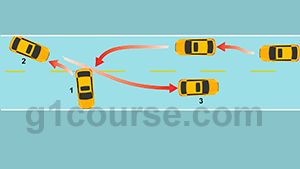
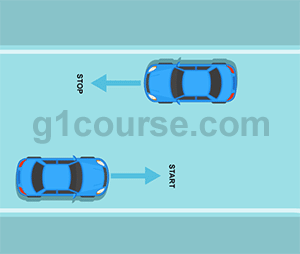
Steer the wheel sharply to the left. Then, drive across the road to the far left side at a slow and steady speed. Stop your vehicle and put it in reserve. Steer the wheel sharply to the right and reverse to face the new direction. Stop and select the forward gear. When turning around, you’ll use the entire road but reverse just once. When reversing, make sure not cross over the edge or drive into a curb or road shoulder.
 Check for traffic
Look in your rearview and side mirrors for vehicles behind you before you begin accelerating.
 Accelerate
As you return to normal traffic speed, increase your speed steadily and gradually, matching the surrounding traffic. Your vehicle should gain speed moderately in light traffic. When you’re driving in heavy traffic conditions, accelerating faster may be necessary. Manual transmission vehicles require changing gears as you accelerate.